NestJS 問世已經有好一段時間了,一直到現在才時間開始研究 NestJS 這一個以 Angular 風格著稱的後端 Node.js 框架,支援 JavaScript 和 TypeScript 語言且擁有 OOP、FP、FRP 的特性,還有其他強大的功能,更多的資訊可以在 NestJS 的文件裡找到。
工具/環境
NestJS 有提供 CLI 工具,可以讓我們透過指令的方式建立專案及其他的元件,就跟 Angular CLI 一樣,可以透過 npm/yarn 安裝成全域工具
1 | npm i -g @nestjs/cli |
當安裝完成後,就可以使用 nest CLI 提供的指令建立 nest 專案了
1 | nest new <project-name> |
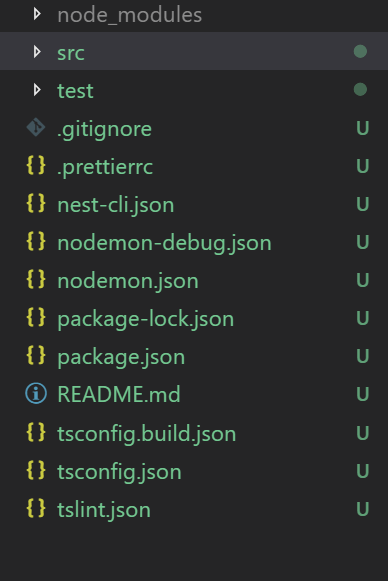
這行指令可以建立一個完整的 nest 專案,包含測試的環境等,最基礎的專案結構分為 src 與 test 兩個資料夾,分別放要執行的程式碼與測試碼,其他的就是一些執行要用的設定檔
至於要怎麼將專案執行起來,在 package.json 內提供了一些 script 可以執行
1 | { |
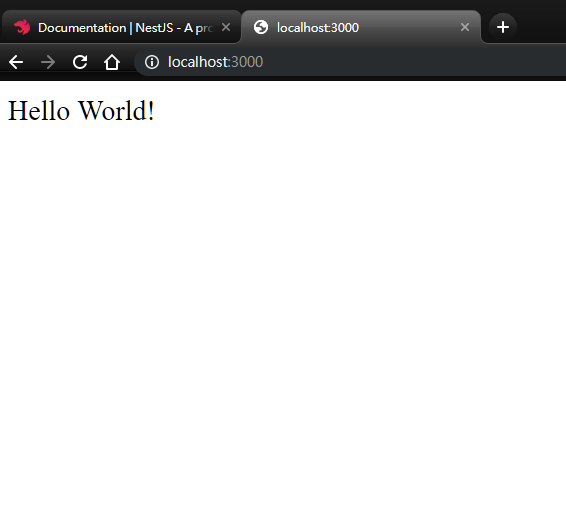
在命令視窗內執行 npm start 即可以將執行環境給跑起來,預設網站的連接埠為 3000,打開瀏覽器並輸入 http://localhost:3000 即可看到以下的畫面
基本架構
Main
-
main.ts: 進入點。決定要啟動哪一個 Module 跟要使用哪一個連接埠,預設為 3000-
有兩種平台可以選擇,
express(default) 與fastify,要設定使用哪一種平台也十分容易,只要在create時指定平台就可以了1
2
3import { NestExpressApplication} from '@nestjs/platform-express';
...
const app = await NestFactory.create<NestExpressApplication>(AppModule); -
fastify 版本
-
npm i @nestjs/platform-fastify1
2
3
4
5
6
7
8
9
10
11
12
13
14
15import { NestFactory } from '@nestjs/core';
import {
FastifyAdapter,
NestFastifyApplication,
} from '@nestjs/platform-fastify';
import { AppModule } from './app.module';
async function bootstrap() {
const app = await NestFactory.create<NestFastifyApplication>(
AppModule,
new FastifyAdapter(),
);
await app.listen(3000);
}
bootstrap(); -
如果是跑在 docker 的環境,
app.listen需要多設定IP1
await app.listen(3000, '0.0.0.0');
-
-
Module
app.module.ts: Root Module,內含 modules、controllers 與 providers 等設定- 相關的觀念與 Angular 的 NgModule 相同
- Global Module:如果有一個 Module 需要重複 import 到其他 Module 時,這時候使用
@Gloabl()的方式標示,就可以讓該 module 成為 Gloabl 等級的模組,但只能被註冊一次。(文件說明)
Controller
-
app.controller.ts: 擁有基本路由設定的控制器-
CLI 建立指令:
nest g controller <controller name> -
路由設定
-
可透過
@Controller(route)的方式來設定最上層的路由,例如@Controller('products'),當瀏覽到http://localhost:3000/products就會進入到這個 Controller ,然後再去找相對應的請求方式及路由設定 -
順序性很重要,讀取順序是由上而下,假設有程式碼的順序如下
1
2
3
4
5
6
7
8
9
10
11
12('products')
export class CatsController {
(':id')
findOne(('id') id: string) {
return `This action returns a #${id} product`;
}
()
getAll() {
// 因為 @Get(':id') 已經攔截了,所以這裡永遠不會執行到
}
}
-
-
請求方式
-
網頁請求的方式有很多種,使用 decorator 的方式來標示 function ,其設定方式直覺
1
2
3
4
5
6
7
8
9
10
11import { Controller, Get, Req } from '@nestjs/common';
import { Request } from 'express';
('products')
export class ProductsController {
()
getAll(() request: Request) {
return [1, 2, 3];
}
} -
請求時的相關資訊,可以透過
@Req()來取得1
2
3
4
5
6
7
8
9
10
11import { Controller, Get, Req } from '@nestjs/common';
import { Request } from 'express';
('products')
export class ProductsController {
()
getAll(() request: Request) {
return [1, 2, 3];
}
} -
更多的資訊可以參考這裡的表格
-
-
非同步
-
支援 async / await
1
2
3
4()
async findAll(): Promise<any[]> {
return [];
} -
更支援 RxJS Observable
1
2
3
4()
findAll(): Observable<any[]> {
return of([]);
}
-
-
Request payload
-
如果是來自 C# ASP.NET MVC 的朋友,一定很習慣當 POST/PUT 這一類的請求,所傳進來的 payload 會配上一個資料模組 (Data model),用來描述所取得的資料結構,而 nestjs 也提供一樣的功能
1
2
3
4
5
6
7
8
9
10
11export class CreateCatDto {
readonly name: string;
readonly age: number;
readonly breed: string;
}
()
async create(() createCatDto: CreateCatDto) {
return 'This action adds a new cat';
}
-
Provider
地位等同於 Angular Service,所有的邏輯跟相關操作都可以放在 provider 層,再透過 DI 的方式讓 Controller 或是其他的 service 使用
1
2
3
4
5
6
7
8
9
10
11
12()
export class CatsService {
private readonly cats: Cat[] = [];
create(cat: Cat) {
this.cats.push(cat);
}
findAll(): Cat[] {
return this.cats;
}
} -
總結
到這裡只是介紹很基本很基本的 NestJS 的內容,還有更多更進階的設定需要被探索,那只能留在之後探勘了。