Office 2016 的增益集,讓我們可以使用 javascript + html 來開發。既然可以使用 Jquery,那 Angular 應該是沒有問題的,這是使用 Angular 實作 Excel 增益集的筆記
建立 Angular 專案
使用 Angular CLI 建立新專案,如果有需要使用路由的,記得要將 LocationStrategy 設定為 HashLocationStrategy
安裝 @types
npm install --save-dev @types/office-js
tsconfig.app.json
在 types 的的區塊加上 office-js
1 | "types": [ |
main.ts
1 | import {enableProdMode} from '@angular/core'; |
platformBrowser 這段一定要包在 function() {…} 裡面。
index.html
1 | ... |
新增這四行到 <head> 內
app.component.ts
這裡的程式,我是先用官方提供的範例翻寫的。詳細的 API 部分,請參閱官方文件
1 | import 'rxjs/add/observable/from'; |
程式碼解釋
loadData()
這個 method 主要是用來驗證 CORS 的情況下, 是否還可以在 Excel 裡正常的運作。
Excel.run
Excel.run((ctx) => { … })
這段是準備要在Excel上顯示的資料
ctx.sync()
準備好的內容,更新同步到 Excel 的 activateSheet 上
polyfills.ts
需要打開以下的檔案
1 | /** IE9, IE10 and IE11 requires all of the following polyfills. **/ |
到這邊為止,已經完成了 Angular 端最基本的環境設定
新增 Manifest.xml
1 |
|
Manifest 的進階說明,請參閱這篇文件
Excel 的環境設定
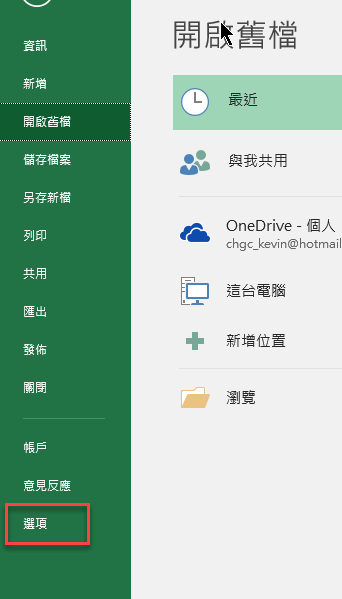
要在 Excel 內新增我們自己開發的增益集,首先
-
建立一個分享資料夾
-
將設定好的 Manifest.xml 搬進去,記得每一個增益集的 manifest 檔名都要不一樣
-
將分享資料夾的位置新增到 Excel 裡面去
-
檔案 --> 選項
-
信任中心
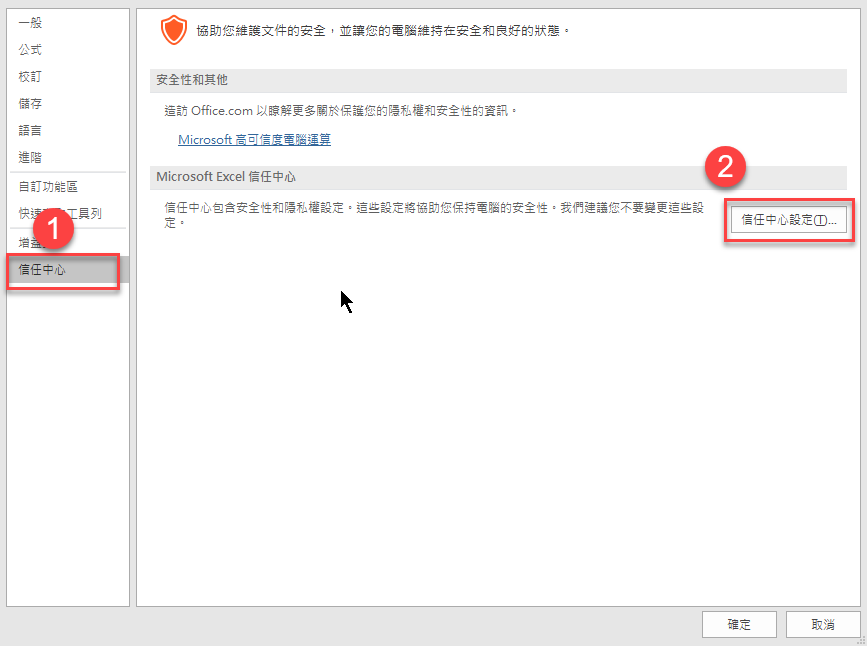
-
受信任的增益集目錄
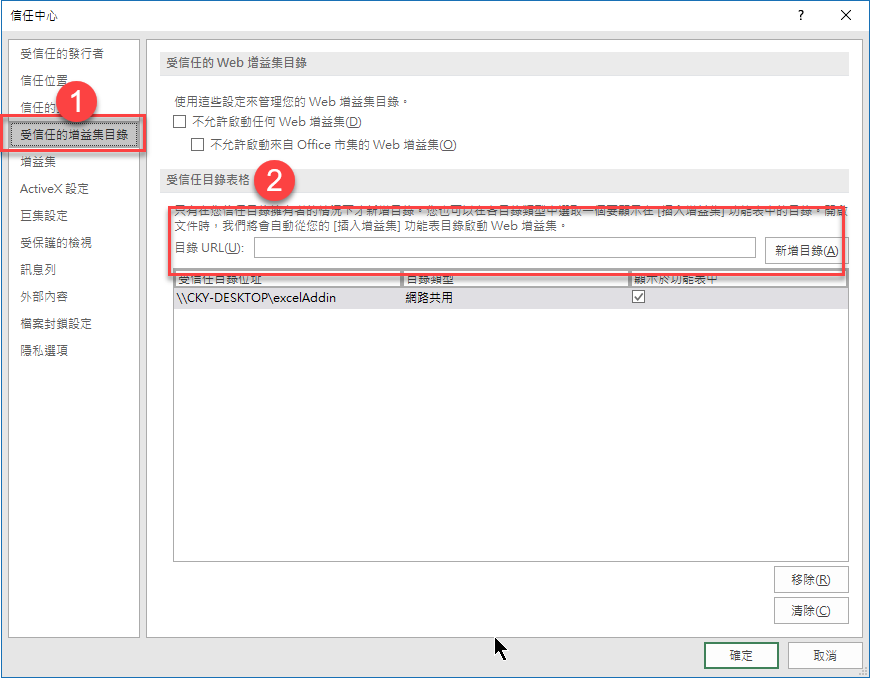
-
確定完成
-
-
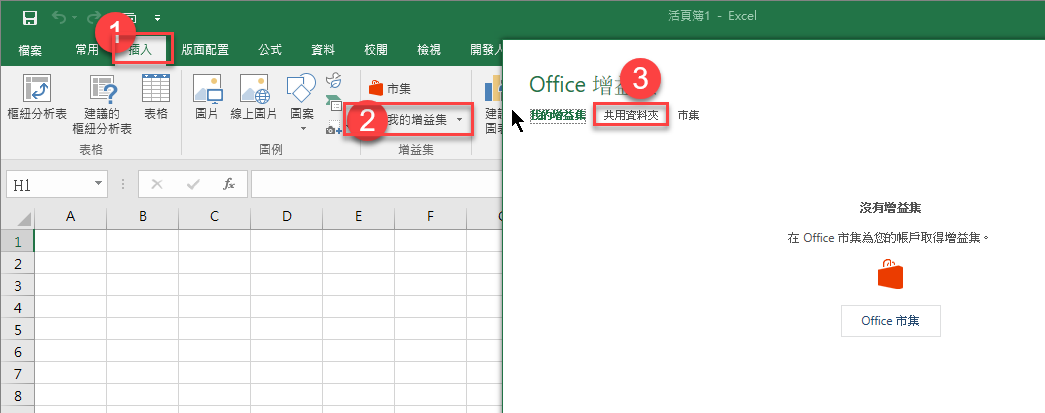
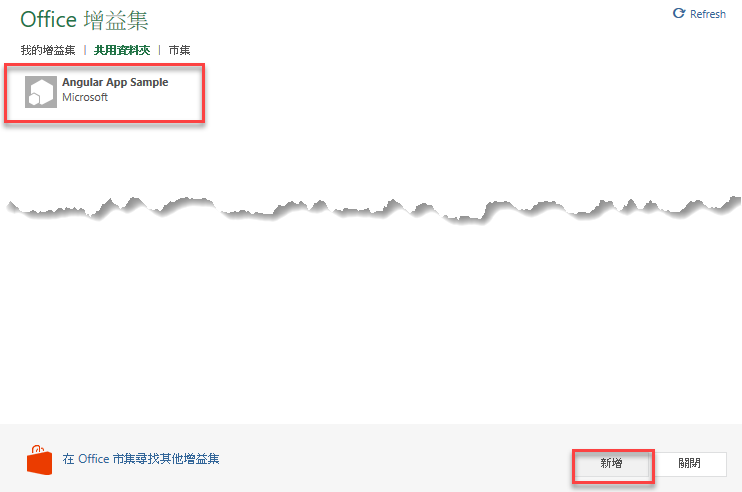
插入 -> 我的增益集 -> 共享資料夾
-
可以看到自己寫的增益集了
-
選擇要安裝的增益集
-
安裝完成後,即可看到所建立的增益集畫面在螢幕的右側出現
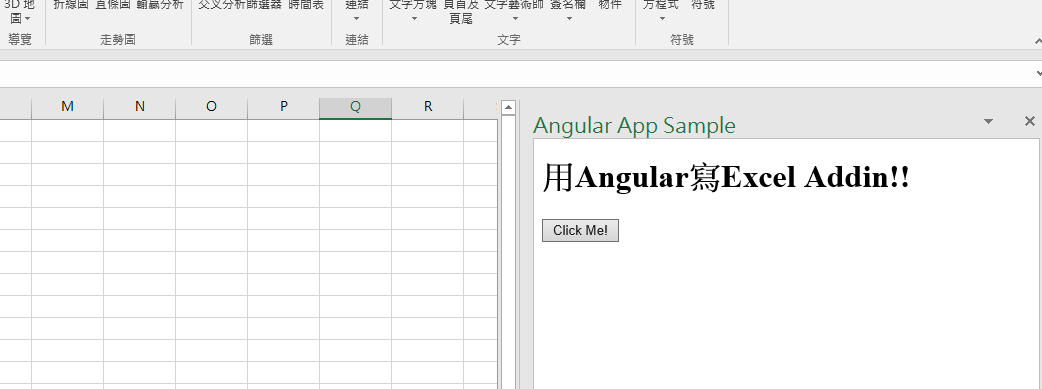
這時右側的操作,就可以直接反應在左側 Excel 工作表內了。

Debug
請參閱這篇文章,在 windows 內提供 F12 開發者工具可以做 Add In 的網頁除錯,但目前看起來是 Windows 10 限定