NestJS 裡大量使用 Decorators 來設定相關的功能,類似 Filter、Pipe、Interceptors、Req、Body 等,當然也可以自訂 Decorators 來做一些我們想要簡化的功能
在 NestJS 內要自訂 Decorators 很單純,NestJS 為我們準備好 createParamDecorator ,可以透過此方法來建立 decorator。這裡有一個官網提供的範例
1
2
3
4
5
| import { createParamDecorator } from '@nestjs/common';
export const User = createParamDecorator((data, req) => {
return req.user;
});
|
當建立完成後,就可以在需要的地方使用
1
2
3
4
| @Get()
async findOne(@User() user: UserEntity) {
console.log(user);
}
|
這樣當執行到這一行時,就可以直接取得 user 的資訊,簡化了很多。這功能在 @Body 也是這樣子完成的。
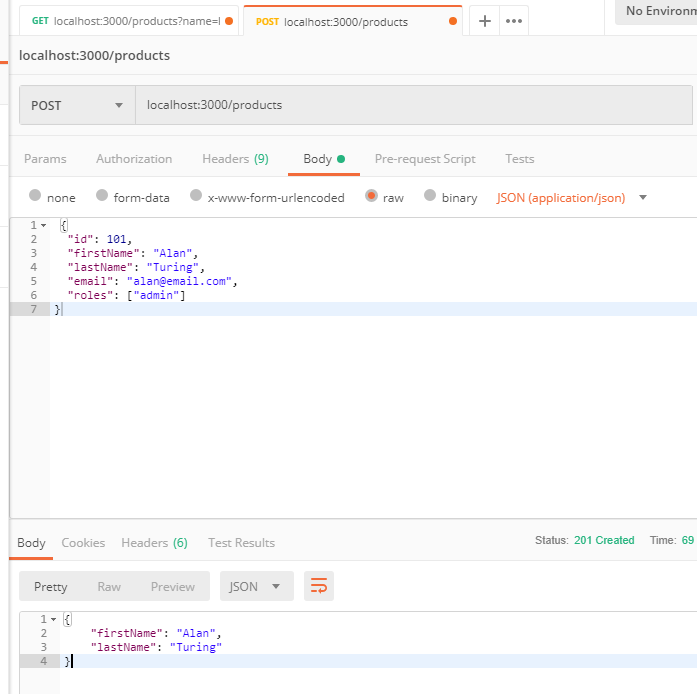
假設資料結構長這樣
1
2
3
4
5
6
7
| {
"id": 101,
"firstName": "Alan",
"lastName": "Turing",
"email": "[email protected]",
"roles": ["admin"]
}
|
可以透過 data 參數,告訴 decorator 更多的資訊,類似這樣子使用 @User('firstName'),在原本 Decorators 的地方也稍微加工一下
1
2
3
4
5
| import { createParamDecorator } from '@nestjs/common';
export const User = createParamDecorator((data: string, req) => {
return data ? req.user && req.user[data] : req.user;
});
|
修改完成後,就可以指定要回傳的資料欄位了,是不是很簡單
實際使用範例
稍微修改一下上面的 decorator
1
2
3
4
5
6
7
8
9
10
11
12
13
| import { createParamDecorator } from '@nestjs/common';
import { Request } from 'express';
export const User = createParamDecorator((data: string[], req: Request) => {
let user = req.body;
if (data) {
user = data.reduce((newuser, prop) => {
return { ...newuser, [prop]: user[prop] };
}, {});
}
return user;
});
|
實際使用
1
2
3
4
5
6
7
8
9
10
|
@Controller('products')
export class ProductsController {
@Post()
create(@User(['firstName', 'lastName']) body, @Res() response: Response) {
return response.status(HttpStatus.CREATED).send(body);
}
}
|
執行結果
參考文件