Angular2的Route的新版持續在開發中,目前已經到了beta階段了,可是Angular2的CLI只是單純的有更新@angular/router的版本而已,但是內建的樣版卻沒有更新,所以只好手動了。
[ASP.NET MVC] MVC Core with SqlClient on MAC
.Net Core 終於支援使用SqlClien的物件了(但不確定是從什麼時候開始的), 那就來試試看怎麼在mac的環境上連到sql server撈資料了
[Angular] ChangeDetectionStrategy
Angular2裡面偵測改變的方法有全新的方式,用來提升整體的效能,那針對Component對於偵測改變有一個屬性可以設定,那就是透過 ChangeDetectionStrategy
[Angular]Service&EventEmitter
在Angular2裡面如何做一個全域型的變數然後當其更新時,讓所有有用到的人都知道。這時候就要用EventEmitter了
[Angular] AngularFire2
Angular2也有一個給Firebase使用的Library, 必計是自家的服務,有相對的AngularFire也是正常的,
目前AngularFire2只支援Firebase SDK V2版本,V3版本還在路上。所以在firebase所建立的專案必須要由舊介面建立後再轉至新Console介面,才可以使用。
AngularFire2現在支援Firebase SDK V3版本了,設定方式如下
[Angular]What's Structural Directives
Angular2 Directives - Structural Directives : 改變DOM element的Directive。常見的structural directives有 ngIf, ngSwitch, ngFor 用法如下.
[Angular]Rxjs的Observers
Angular2裡面有用到RxJS的Extensions. 那這個Extendsion會帶給Angular2怎樣的幫助,來研究一下Http的程式碼吧
[Angular]升級到RC
Angular發佈RC了,來升級吧
[Coding4Fun] Build my own Markdown editor - Part I
因為找不到自己想要的Markdown編輯器,所以自己來寫一個.
想要的功能
[Angular] css style
Angular Component 處理styles有三種模式 1. ViewEncapsulation.None: 適用於全部頁面(No Shadow DOM) 2. ViewEncapsulation.Native: 僅套用於Shadow DOM自己本身 3. ViewEncapsulation.Emulated: 預設行為。 會自動將每個component給予一個名稱,讓各compoent裡面的style會各自獨立
先來看第1,2種,看看style會被放在哪一個位置
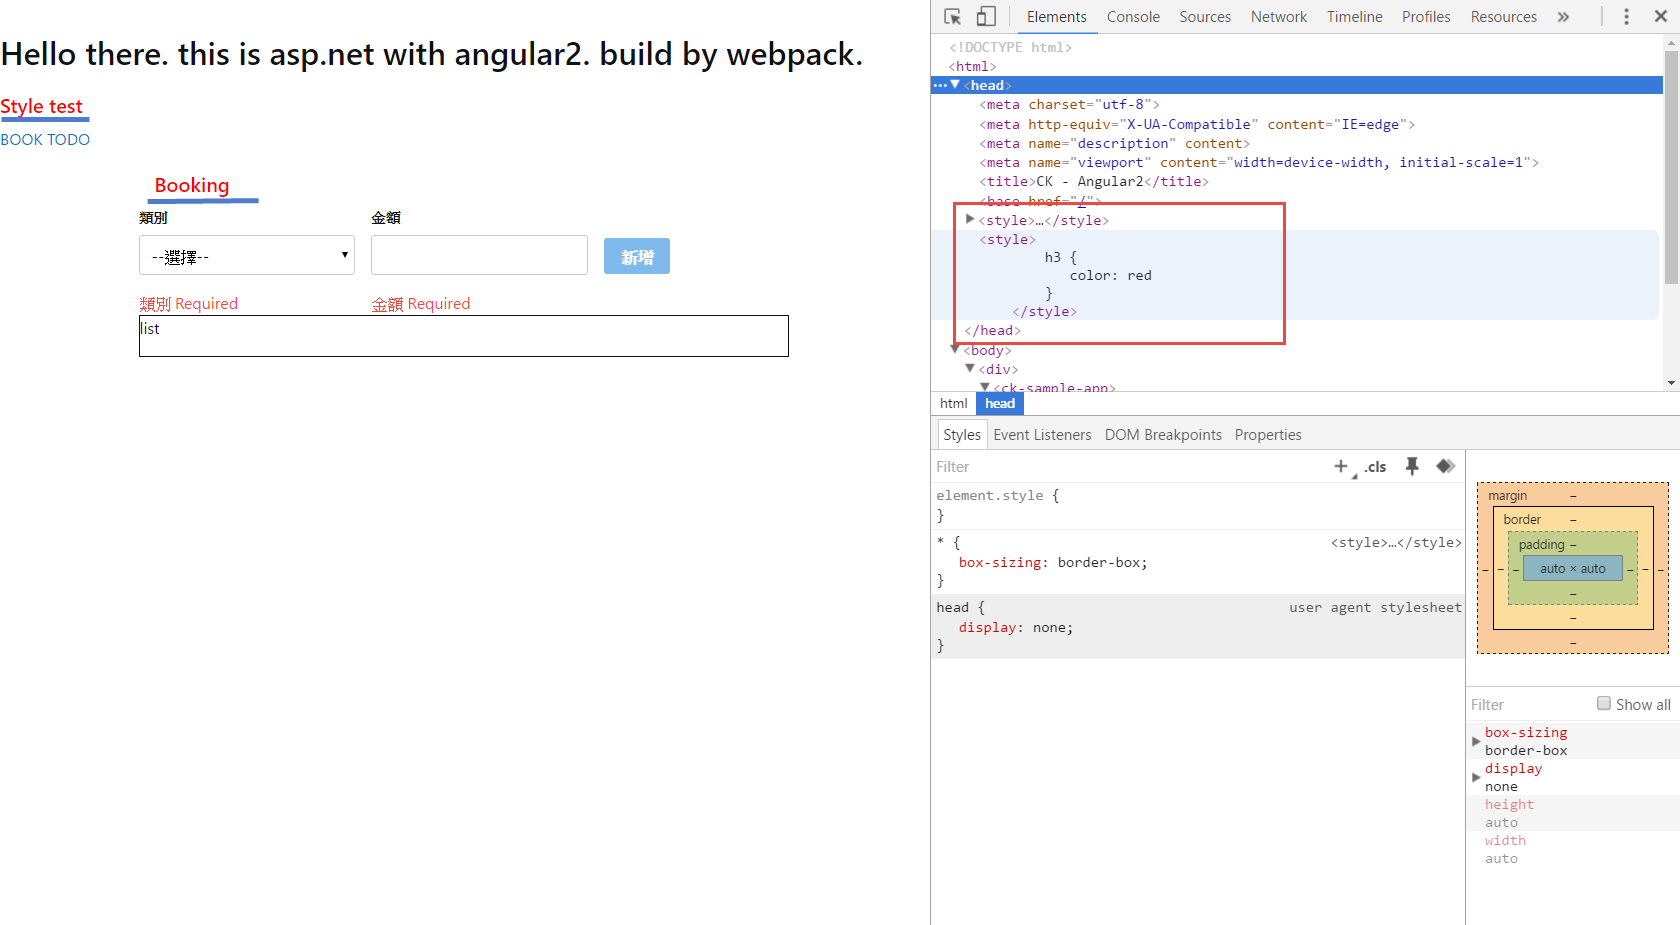
- ViewEncapsulation.None
1 | @Component({ |
2.ViewEncapsulation.Native
1 | @Component({ |
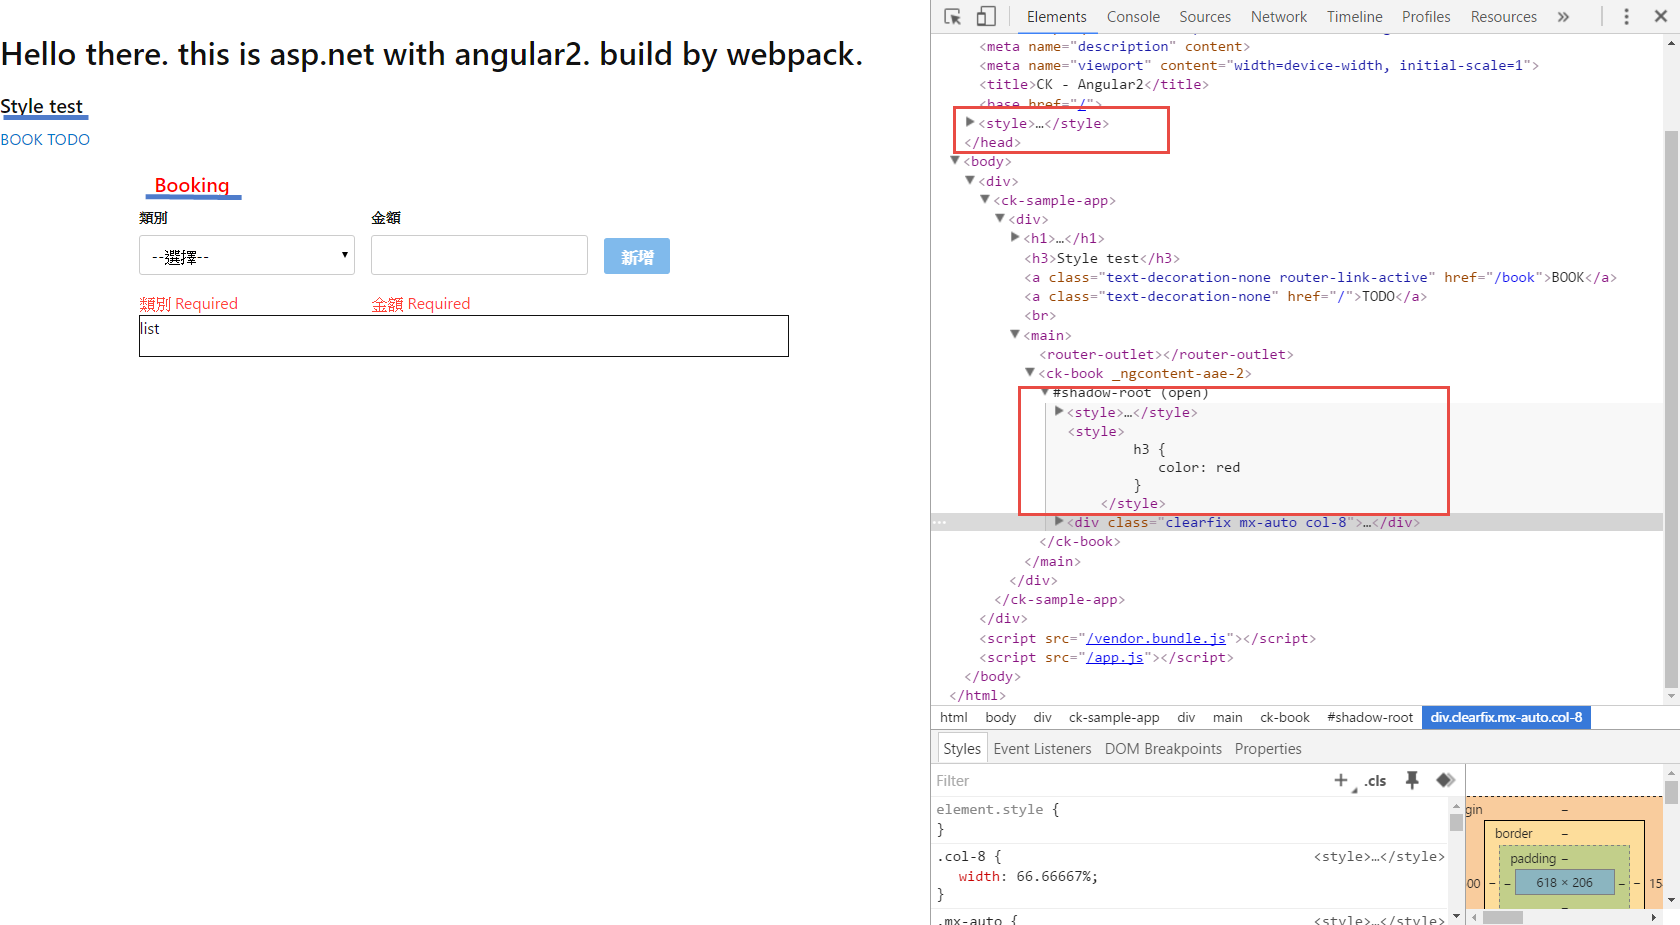
注意到ViewEncapsulation.Native將ViewEncapsulation.None的和本身定義的Style都包含在Shadow DOM裡面,這表示該Componenet與外面已經分開了. 本身所定義的css樣式不會影響到別人了
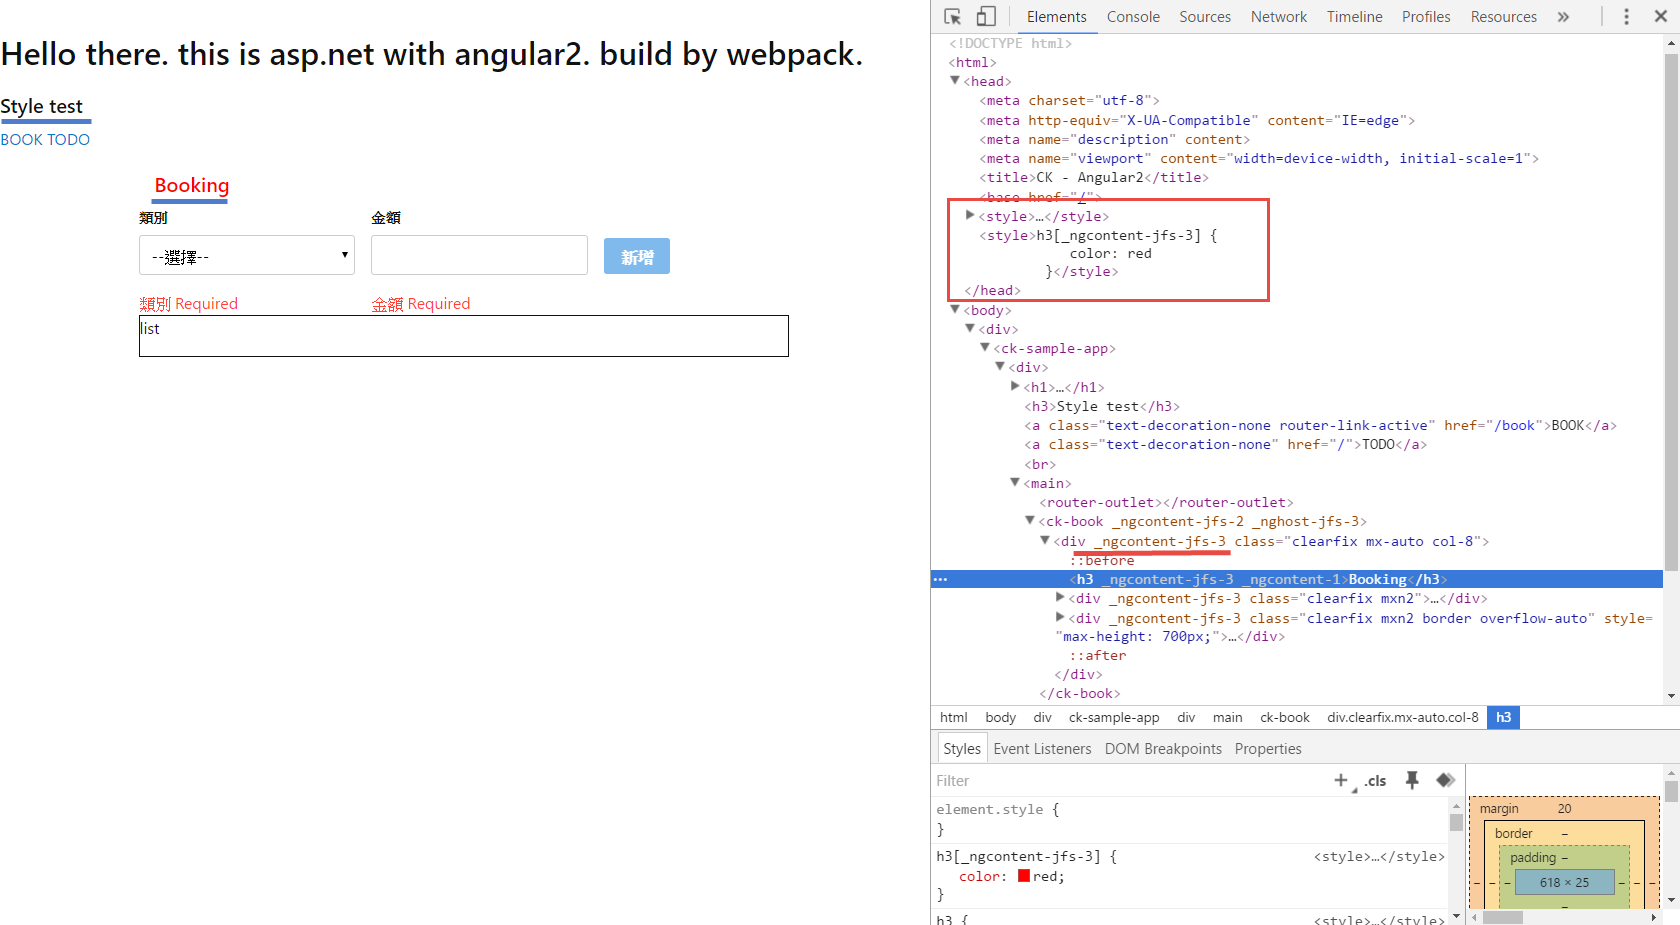
- ViewEncapsulation.Emulated為預設行為,會自動將每個Component給予一個名稱,然後在產生html時會將各Componet裡 定義的style加上該名稱,讓css不會互相影響
1 | @Component({ |
1 | <style>h3[_ngcontent-jfs-3] { |